Build Your Backrooms Buildings Tier List
Ranked layout pieces that turn empty plots into choke-heavy mazes monsters can actually farm.
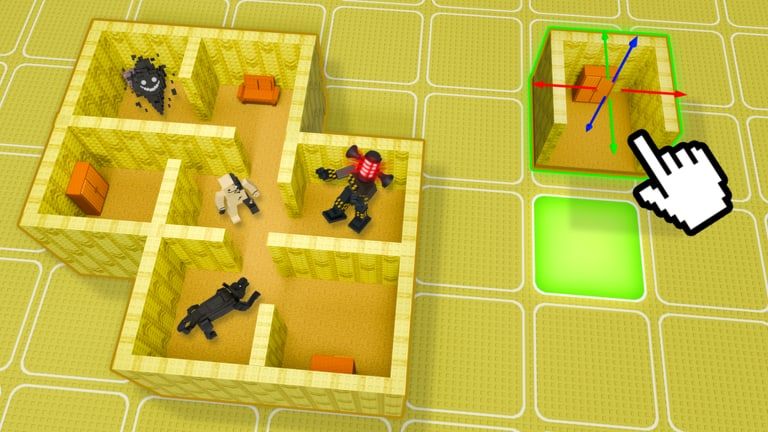
Buildings are the skeleton of every maze in Build Your Backrooms on Roblox. Wind Sun Moon [WSM] lets you collect placeable segments—hallways, corners, junctions, and specialty rooms—then stock them with monsters that catch visitors for cash. This Buildings Tier List ranks layout pieces by how effectively they compress visitor pathing and raise catch density, not by wallpaper quality alone.
Use alongside the Monsters Tier List and Buildings Index. Ranking definitions live on the Tier List Hub.
Why buildings outrank monsters early
Visitors follow walkable tiles. Monsters only earn when routes force proximity. A mid-tier hunter at a sharp choke often beats an S-tier hunter in a field with six exits. That is why many progression guides recommend unlocking core structure before chasing rare monsters—see Cash Progress Tips for spend order math.
Ranking criteria
| Factor | Weight | Notes |
|---|---|---|
| Path compression | High | Fewer escape tiles per minute of exploration |
| Monster synergy | High | Creates natural homes for corridor and junction roles |
| Repeatability | Medium | Stacks cleanly in large mazes without awkward gaps |
| Unlock cost | Medium | Early cash limits how many premium pieces you place |
| Visitor retention | Low | Too much frustration can shorten visits |
S Tier — Maze foundation pieces
Standard Liminar Hallway Module
The bread-and-butter straight segment. Repeatable, cheap enough to span long routes, and perfect for corridor stalker monsters placed at mid-span sightlines.
Why S tier: Highest encounters per Robux when tiled end-to-end with minimal side exits.
Four-Way Junction Core
Forces a decision every crossing. Pair with junction lurker monsters on the least obvious branch to maximize wrong-turn catches.
Why S tier: One tile creates four approach angles—best density per building slot in the entire catalog.
Offset Corner Link
Breaks line-of-sight so visitors cannot sprint past hunters that need a wind-up. Essential for slow bulwark monsters until you upgrade hunters.
Why S tier: Turns otherwise weak monsters into viable income on budget rosters.
A Tier — Strong support structure
T-Junction Branch
Simpler than four-way cores but excellent for mid-size mazes. Use dead-end branches as trap wings.
Narrow Squeeze Segment
Single-file width prevents sidestepping. Slightly lower repeat flexibility than standard hallways but deadly with quick tag hunters.
Loop Connector
Closes circular routes so visitors cannot backtrack to entrance without passing another monster line.
Elevated Threshold Room
Small transition space between hallway chains—good anchor for zone patrollers without building huge chambers.
B Tier — Situational layout tools
Wide Gallery Span
Looks authentic to backrooms photography but spreads visitors unless you add inner pillars or secondary paths.
Mirror Hall Duplicate
Disorients first-time explorers. Repeat visitors learn patterns quickly unless you rotate branch signs between updates.
Short Stub Hall
Cheap filler between rooms. Fine for padding length; weak alone for catch density.
Utility Closet Niche
Side alcove that triggers noise-hunter monsters. Niche but fun in horror-themed mazes.
C Tier — Aesthetic or specialty
Open Plaza Chamber
Showcase piece for screenshots and social visits. Income per tile lags unless filled with multiple patrollers.
Decorative Pillar Cluster
Breaks sightlines aesthetically but leaves bypass routes unless tightly packed.
Color-Variant Hallway
Same pathing as standard modules with different texture. Pay for looks after function is covered.
F Tier — Low priority for income mazes
Dead-End Cap (standalone)
Without trap-wing context, visitors rarely enter voluntarily.
Oversized Feature Room (early unlock)
High tile cost before you own monsters that need the space.
Legacy Starter Segment
Replaced by Standard Liminar modules in both flexibility and price.
Layout patterns by tier combo
Income loop (recommended starter)
- Chain Standard Liminar Hallway Modules into a long spine.
- Insert T-Junction Branches every four to six segments.
- Cap dead branches with Dead-End Guard monster slots (see Monsters Tier List).
- Close the route with a Loop Connector back to mid-spine.
Offline-friendly grid
- Build a Four-Way Junction Core hub.
- Radiate hallway arms with Offline Anchor monsters at each exit.
- Keep total loop time under two minutes so visitors complete runs while you are away.
Showcase maze
- Lead with Wide Gallery Spans for visuals.
- Hide income pieces in side Narrow Squeeze Segments so casual tours still earn cash.
Building count guidelines
| Maze size goal | Minimum S/A hallway pieces | Junction count |
|---|---|---|
| Starter income | 8–12 modules | 2 T-junctions |
| Mid-game farm | 20–30 modules | 1 four-way + 4 T-junctions |
| Large community maze | 40+ modules | Hub-and-spoke junction grid |
These numbers assume six-player server traffic. Low-visit mazes should shrink total length so explorers finish runs instead of quitting.
Common building mistakes
- Too many exits early — Every shortcut bypasses monsters.
- Uniform width everywhere — Mix narrow and standard segments to change hunter effectiveness.
- Monsters before junctions — Hunters without decision points catch less.
- Ignoring revisit learning — Rotate branch bait between patches so repeat visitors mis-guess again.
Run the Maze Design Checklist before publishing major edits.
Exploring other mazes for ideas
When visiting community layouts, screenshot junction spacing—not entire mazes—to avoid copying one-to-one. Roblox allows six players per server; tour with friends and assign roles: one maps, one triggers monsters, one times route length.
Patch awareness
New building sets may arrive during Build Your Backrooms’ early live period (June–August 2026 and beyond). Track the Updates Hub and refresh this list when shop rotations change. Cross-link new pieces in the Buildings Index as names are confirmed.
Related pages
- Monsters Tier List — Hunter rankings that depend on these layouts
- Buildings Index — Full catalog with role tags
- Catalog Hub — Overview of both collection types
- Tools Hub — Planning checklists and cash guides
Frequently Asked Questions
Quick answers for maze builders and explorers.
Should I buy buildings before monsters?
Usually yes. Core hallway and junction pieces create choke points where any monster earns more. Exception: one cheap Starter Elite monster can help test routes while you build.
What is the single best building piece?
Standard Liminar Hallway Modules and Four-Way Junction Cores are the most consistent S-tier picks for income mazes because they compress pathing and stack cheaply.
Do buildings affect offline income?
Indirectly. Buildings shape visitor routes while you are away; monsters on those routes earn offline catches. Better layout means better passive income.
How do I make wide rooms worth placing?
Add inner narrow segments, secondary loops, or multiple patroller slots. Wide Gallery Spans alone are C-tier for cash but fine for visual showcase wings.
Can I replace buildings without losing progress?
Check current in-game redeployment rules after each update on the Updates Hub. This wiki tracks layout strategy; exact edit modes may change in patches.